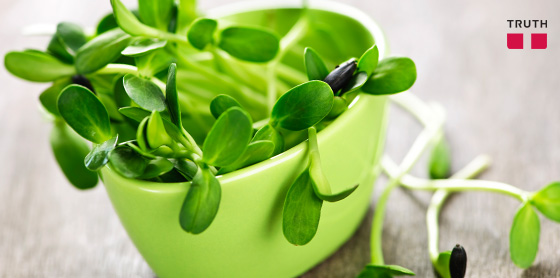
Vegan fashion ties in very closely with veganism, and healthy diets in general. And although I’m a fan of vegan fashion, I’m not a vegan myself. But I do love vegetables, and I do love gardening.
The idea of growing my own food is very exciting to me. After all, locally grown, fresh food is one of my favourite things, but living in the city it’s hard to find the space where I can do it properly.
Fortunately, I’ve found a way around it, and today I’m sharing that with you! For less than $100, I set up my own sprouting operation. Why did I bother with all this? What are sprouts? And what are the health benefits of sprouts? All this, and more, will be revealed to you!
What are sprouts?
Sprouts are baby plants. When you take a seed and plant it, it begins to grow. And until it grows large enough to be a full plant, it’s a sprout.
The sprouts of certain seeds are known to have amazing health benefits. Sprouting seeds improves the amount and quality of their protein, fiber, vitamins, essential fatty acids, and more. In fact, they’re one of the most nutritionally dense foods out there.
They’re easy to digest, and they’ve also got an alkaline effect on the body, which many researchers believe can go a long way toward preventing cancer. After all, cancer cells
cannot survive in an alkaline environment.
What are the best sprouts?
Lots of seeds are great to sprout. Mungbeans, chick peas, alfalfa, mustard seed, cress, and beet sprouts are all popular favourites. But if you want to get started right now, you can use seeds which you probably already have in your home!
The Ingredients
There are many different ways to set up a sprouting operation, and I’m not going to pretend the way I’ve done it is the best or the only way. But I do know it works, because I use it myself!
To get your new sprouting operation going, you’ll need the following:
- A light ballast
- Light bulbs
- A shelf
- A tray
- Paper towel
- Clean water
- Seeds
Most seeds don’t need light to germinate, but as soon as they’ve started sprouting they need a good source of light. If you’re fortunate enough to have a south-facing window in your house (or north-facing if you’re in the southern hemisphere) which gets a lot of sunlight, you might even be able to skip this part.
But if you’re like me, and don’t have a whole lot of natural light in the area where you’re sprouting, you’ll need a light source.
The ballast itself doesn’t need to be anything special, but the bulbs do. How much you spend on the ballast depends on how many seeds you’d like to sprout, but I paid about $50 for my ballast, which is about 4 feet long.
The bulbs should be fluorescent lights, because incandescent bulbs are too hot for your seedlings. They also give off too much blue-spectrum light, which isn’t what your seedlings need.
There are all sorts of bulbs out there which are specially designed for sprouting seeds, and they usually come with a bigger price tag. But basic fluorescent shop lights will do you just fine, especially when you’re just starting off. Most ballasts have room for two bulbs, but you can easily make do with just one.
The shelf doesn’t need to be anything special either, other than that you need to be able to attach the ballast to it. A cheap wire shelf will do just fine. Mine was $25 from Canadian Tire.
For the paper towel, it’s best to get the cheap brown stuff since it hasn’t been dyed or altered, but honestly anything will do.
They sell plastic growing trays at Canadian Tire like the one in the picture below for less than $2, but if you’re feeling particularly penny-pinching, you can use any sort of container, so long as it’s shallow enough that you can access your sprouts easily, and wide enough that you can grow enough sprouts to make it worth the time investment. Oh, and make sure there are no holes in the bottom.
As for the seeds, you can grow just about anything. But my favourites are lentils and flax seeds. Not only do both have many proven health benefits, they’re also cheap and readily available. You can sprout the lentils and flax seeds which you find in your local grocery store or bulk food dispensary.
The Setup
Hang your ballast from the top of your shelf (the ballast should come with what you need to do that). From there, attach the bulb, and put your tray on the shelf. Then, lay out two layers of paper towel flat in the tray. Depending on the size of your tray, you may need to cut the paper towel to make it fit properly.
Sprinkle some seeds on the paper towel roughly evenly, but leave a small area in the corner empty. This is where you’ll pour their water, so the seeds don’t move around too much and the sprouts aren’t damaged.
Then, plug in your lamp, and watch it grow!
So there you have it! A quick, easy sprout setup for under $100! And now you’ve got a quick, easy source of superfoods growing right in your home! Check out my latest harvest!
Is this the absolute best practice for growing sprouts? No, far from it. If you wanted to take things to the next level, there are all sorts of products out there you can use. What I’ve shown you here is a quick, inexpensive way you can start growing sprouts today for less than $100.
Give it a shot!
Thanks for reading! Yours in good health, this is
Brad Edwards for
Truth!
Live Your Truth, and Respect Others’!


Great article Brad! I myself enjoy sprouting mung beans. They are great in salads!
Is there any way I can get a picture of your set-up?